WhatsApp also offers various additional features, including the ability to share location information, create and join groups, set status updates, and make use of stickers and emojis to enhance communication. In recent years, WhatsApp has introduced features such as WhatsApp Business, which is designed specifically for businesses to connect with their customers and provide customer support.
WhatsApp allows users to send messages to individuals or small groups, sending bulk messages can be a challenge. However, there are tools available, such as wa Notifier, that utilize the official WhatsApp Cloud APIs to send unlimited messages to multiple contacts. In this article, we will explore how to use WA Notifier to send bulk WhatsApp messages while ensuring compliance with WhatsApp’s terms and services.

Step 1: Creating an Account on Wa Notifier
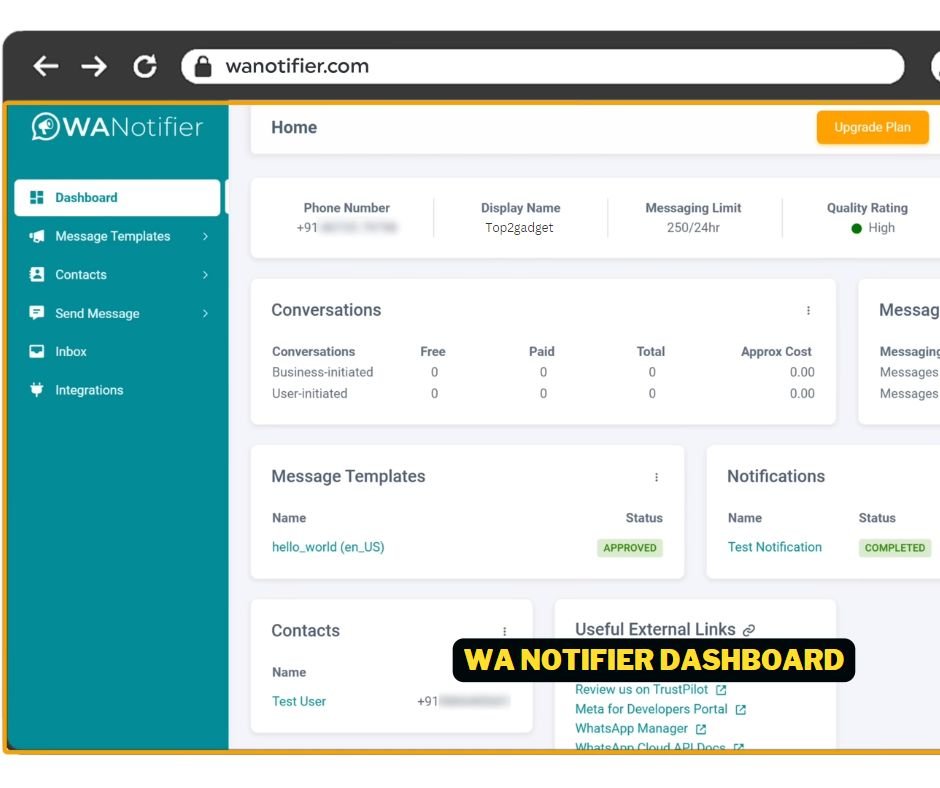
To begin, you need to create an account on wa Notifier. Visit the wa Notifier website and click on the “Get Started for Free” button. Enter your details and sign up for an account. Once you’ve signed up, verify your email address through the link sent to your email. After verification, you will be directed to the Wa Notifier dashboard.
Step 2: Getting WhatsApp Cloud API Credentials
Before sending bulk messages, you need to obtain WhatsApp Cloud API credentials. Follow these steps:
- Log in to the Facebook Developer Portal using your Facebook account credentials.
- Create an app for WhatsApp’s Cloud API by clicking on “My Apps” and then “Create App.” Choose the app type as “Business” and provide a name for your app, such as “Wa Notifier.”

- After creating the app, add WhatsApp as a product by clicking on “Setup.”

- Set up your phone number in WhatsApp Cloud API by clicking on “Start Using the API.” Enter your business name, website URL, country, business category, and an unregistered phone number. Complete the verification process to add the phone number.
- Configure webhooks by clicking on “Configuration” and then “Edit.” Enter the webhook details, including the URL and verification token provided by wa Notifier. Save the changes and subscribe to the required fields for full integration.
- Generate a permanent access token by creating a system user, adding assets, and selecting the necessary WhatsApp business-related options. Copy the access token once it is generated.
Step 3: Adding Payment Method and Changing App Mode
To send messages through WhatsApp Cloud API, you need to add a payment method. Navigate to the wa Notifier dashboard and click on “WhatsApp Accounts,” then “Settings,” and finally “Payment Methods.” Add your card details to enable payment for message sending.
Next, change the app mode to live by enabling the button provided. Ensure that you have added a privacy policy URL and selected the appropriate category for your app. Click on “Get Started” in the WhatsApp section and ensure your phone number is selected. Copy the obtained credentials, including phone number ID, WhatsApp business account ID, and the permanent access token.
Step 4: Adding Contacts and Message Templates
Now that you have the necessary credentials, you can start adding contacts and creating message templates.
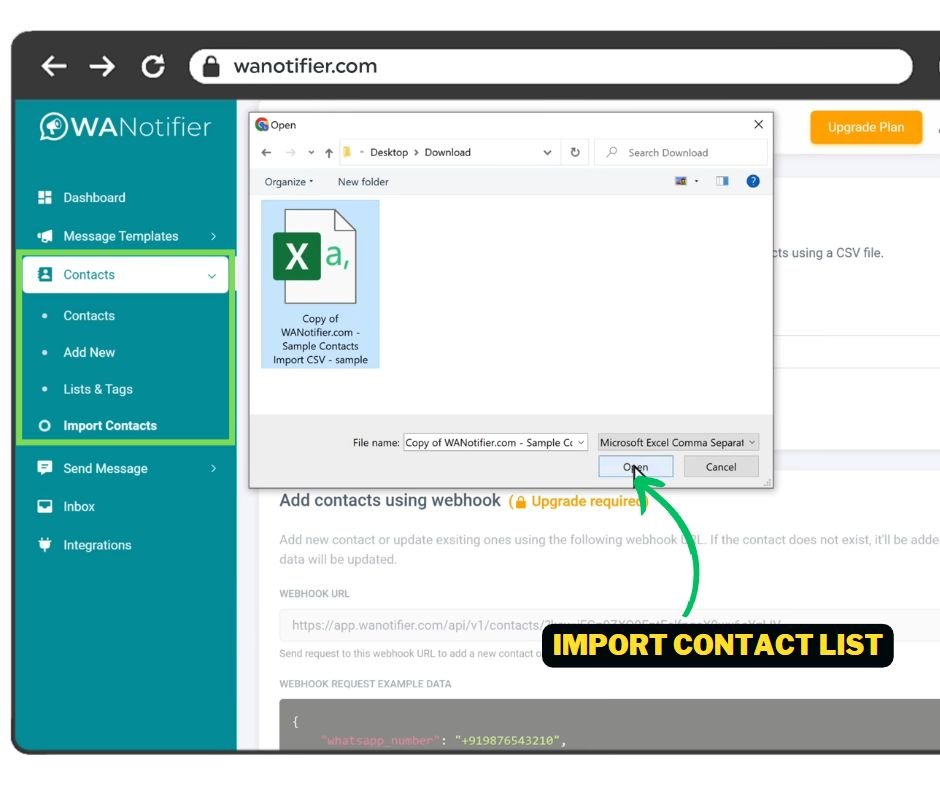
- Navigate to the “Contacts” section in Wa Notifier and add contacts manually or import them from a Google Sheet. Make sure to enter the contact details accurately and save them.

- Create a message template by clicking on the “Message Template” section. Provide a name for the template, select the category as “Marketing,” and choose a header type (text or media). Add content to the template, including images if desired. You can also add call-to-action buttons with custom URLs.

- Submit the message template for approval. WhatsApp will review and approve it within 24 to 48 hours.
- After your message template gets approved, you can proceed to send bulk messages.
- In the “Send Message” section of Wa Notifier click on “Add” to create a new message. Enter a title for the message, select the message type, choose the contact list you created earlier, and select the approved message template. Preview the message and click “Save and Send” to start sending the messages to all the contacts in your list.

Step 5: Sending Bulk Messages and Tracking Status
Once the message template is approved, you can proceed to send bulk messages to your contacts.
Wa Notifier allows you to track the status of your sent messages. In the “Notification” section, you can view the messages that have been sent, along with the number of members who have received and read them. If a recipient replies to your message, you can check the replies in the “Inbox” section and respond to them directly.

Conclusion!
Using wa Notifier and the official WhatsApp Cloud APIs, you can send bulk messages to your customers without violating WhatsApp’s terms and services. By following the steps outlined in this article, you can create an account, import and manage your contacts, create message templates, and send bulk messages while tracking their status and managing replies. With wa Notifier, you can effectively engage with your customers on WhatsApp in a safe and authorized manner.